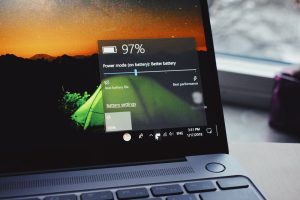
Choose Energy Saving Settings: Battery saving Windows provides different power plans that allow you to adjust your PC’s performance and energy usage based on your needs. To select an energy-saving setting: Battery saving Windows 11: Select Start > Settings > System > Power & battery. From there, you can choose the “Battery saver” mode or
Choose Energy Saving Settings: Battery saving
Windows provides different power plans that allow you to adjust your PC’s performance and energy usage based on your needs. To select an energy-saving setting: Battery saving
- Windows 11: Select Start > Settings > System > Power & battery. From there, you can choose the “Battery saver” mode or customize power settings to optimize battery usage.
- Windows 10: Right-click on the battery icon in the taskbar and select “Power Options.” Choose a power plan like “Power Saver” that reduces the PC’s performance to conserve energy.
2. Use Battery Saver:
Both Windows 11 and Windows 10 come with a built-in “Battery Saver” feature designed to preserve battery life by limiting background activities and notifications. You can enable it manually or set it to activate automatically when your battery reaches a specific percentage:
- Windows 11: Access Battery Saver by selecting Start > Settings > System > Power & battery > Battery saver. Toggle the switch to turn it on or customize its behavior further.
- Windows 10: Click on the battery icon in the taskbar and select “Battery Saver” to activate it. You can configure its settings by going to “Battery settings” and clicking on “Battery saver settings.”
3. Change Display Settings:
The display is one of the most power-hungry components on your PC. Reducing brightness and adjusting sleep settings can have a significant impact on battery life:
- Windows 11: Access display settings by selecting Start > Settings > System > Display. Lower the brightness and set a shorter display timeout to conserve energy.
- Windows 10: Right-click on the desktop and choose “Display settings.” Adjust the brightness and choose a shorter “Turn off display” time to save power.
4. Change Power Settings:
You can further fine-tune power settings to achieve the desired balance between performance and battery life:
- Windows 11: Access power settings through Start > Settings > System > Power & battery > Additional power settings. Choose a power plan that meets your requirements or create a custom plan.
- Windows 10: Access power options by right-clicking on the battery icon in the taskbar and selecting “Power Options.” Customize the power plan or create a new one to optimize battery usage.
Photo by Panos Sakalakis on Unsplash
5. Keep Your PC Plugged in Until It’s Fully Charged:
Frequently unplugging and recharging your laptop can put additional stress on the battery. To prolong battery lifespan, keep it plugged in until it reaches full charge.
6. Restart Your PC:
Restarting your PC can resolve potential issues and background processes that might be draining your battery unnecessarily.
7. Turn on Airplane Mode:
If you don’t need internet, Bluetooth, or other wireless communications, activating Airplane mode can significantly reduce power consumption:
- Windows 11: Access Airplane mode through Start > Settings > Network & internet. Toggle the switch to enable it.
- Windows 10: Click on the network icon in the taskbar and toggle “Airplane mode” to turn it on.
By implementing these battery-saving tips on your Windows 11 or Windows 10 PC, you can enjoy longer battery life and enhanced mobility without compromising on performance or productivity. Embrace these power-saving practices to make the most of your portable computing experience.


Leave a Comment
Your email address will not be published. Required fields are marked with *