
Introduction to Windows Remote Desktop Gateway Windows Remote Desktop Gateway (RD Gateway) is a vital role in deploying Remote Desktop Gateway servers for secure remote access to your Remote Desktop environment. Whether you are setting up an on-premises, cloud-based, or hybrid environment, RD Gateway provides a seamless connection to your machines. In this article, we
Introduction to Windows Remote Desktop Gateway
Windows Remote Desktop Gateway (RD Gateway) is a vital role in deploying Remote Desktop Gateway servers for secure remote access to your Remote Desktop environment. Whether you are setting up an on-premises, cloud-based, or hybrid environment, RD Gateway provides a seamless connection to your machines. In this article, we will guide you through the installation and configuration process of the latest version of RD Gateway.
1. Installing the RD Gateway Role
To get started with RD Gateway, follow these steps to install the role:
- Sign in to the target server using administrative credentials.
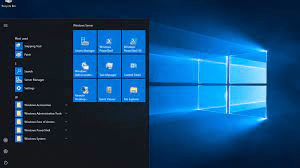
- Open Server Manager and select “Manage,” then click on “Add Roles and Features.”
- In the “Before You Begin” screen, select “Next.”
- Choose “Role-Based or feature-based installation” in the “Select Installation Type” screen and click “Next.”
- For “Select destination server,” choose “Select a server from the server pool” and pick the name of your local computer. Click “Next” when done.
- Under “Select Server Roles > Roles,” select “Remote Desktop Services,” and proceed by clicking “Next.”
- In the “Remote Desktop Services” screen, select “Next.”
- Under “Select role services,” choose only “Remote Desktop Gateway.” When prompted to add required features, select “Add Features” and then click “Next.”
- Proceed by selecting “Next” for “Network Policy and Access Services.”
- For “Web Server Role (IIS),” click “Next.”
- Under “Select role services,” proceed by clicking “Next.”
- Review your installation selections in the “Confirm installation selections” screen, and if everything looks correct, click “Install.” Make sure not to close the installer while the installation process is underway.

Image by https://www.google.com/
2. Configuring the RD Gateway Role
After the successful installation of the RD Gateway role, it’s time to configure it. Follow these steps to complete the configuration:
- Open the Server Manager and select “remote desktop’s Services.”
- Under “Servers,” right-click the name of your server, and then choose “RD Gateway Manager.”
- In the “RD Gateway Manager,” right-click the name of your gateway, and select “Properties.”
- Go to the “SSL Certificate” tab, and choose “Import a certificate into the RD Gateway” option. Click “Browse” and “Import Certificate…”.
- Locate your PFX file and click “Open.”
- Enter the password for the PFX file when prompted.
- After importing the certificate and its private key, the display should show the certificate’s key attributes.
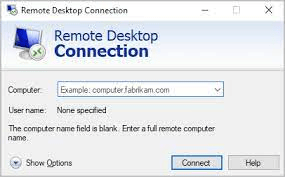
3. Next Steps for Remote Desktop Access
Congratulations! You have successfully installed and configured the Windows Remote Desktop Gateway. Now, you can enable secure access to your remote desktop’s environment using RD Gateway. Make sure to follow security best practices and regularly update your gateway to maintain a safe and efficient remote working environment.


Leave a Comment
Your email address will not be published. Required fields are marked with *