
Setting a Default Printers on Windows: How to Stop Automatic Changes Setting a Default Printers on your Windows PC is a convenient way to streamline your printing tasks across various apps and programs. However, if you’re finding that your default printer keeps changing without your permission, it can quickly become an annoying and time-consuming issue.
Setting a Default Printers on Windows: How to Stop Automatic Changes
Setting a Default Printers on your Windows PC is a convenient way to streamline your printing tasks across various apps and programs. However, if you’re finding that your default printer keeps changing without your permission, it can quickly become an annoying and time-consuming issue. In this guide, we’ll walk you through effective methods to regain control over your default printer settings and put an end to those frustrating changes.
1. Preventing Automatic Changes to Your Default Printer
One common reason for your default printer to change unexpectedly is Windows’ automatic printer management feature. This feature might switch your default printer based on your current location, causing inconvenience. To prevent this, follow these steps:
- Open the Start menu and click on the gear-shaped icon to launch the Settings app.
- Select “Bluetooth & devices” from the left sidebar.
- Click on “Printers & scanners.”
- Under the “Printer preferences” section, disable the toggle next to “Let Windows manage my default printer.”
- Now, choose the printer you want to set as the default option.
- Click the “Set as default” button at the top.
By completing these steps, Windows will no longer change your default printer automatically, giving you the printing consistency you desire.
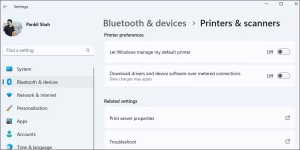
Image by https://www.makeuseof.com/
2. Editing Registry Files to Resolve Persistent Printer Changes
If the default printer continues to change despite disabling automatic management, you might need to edit the registry files for a more thorough fix. However, remember that incorrect changes to registry files can cause serious damage to your computer. Follow these steps carefully:
- Press Win + S to open the search menu.
- Type “registry editor” in the search box and select “Run as administrator.”
- Select “Yes” when the User Account Control (UAC) prompt appears.
- In the Registry Editor window, navigate to HKEY_CURRENT_USER > SOFTWARE > Microsoft > Windows NT > CurrentVersion > Windows.
- Double-click the “LegacyDefaultPrinterMode” key in the right pane to edit it.
- Enter “1” in the Value data field and click OK.

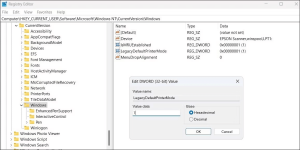
After completing these steps, restart your PC and proceed to set your default printer again using your preferred method. Check if the issue persists.
3. Exploring Generic Windows Fixes
In most cases, the above solutions should resolve the problem. However, if the issue persists, consider these additional steps:
- Remove unused printers: Uninstall printers that are no longer in use, along with related software, to avoid conflicts.
- Scan for malware: Malware can disrupt system settings. Use PowerShell to scan for threats.
- Install Windows updates: Keep your system up to date to benefit from bug fixes and enhancements.
- Create a new user account: Corrupted user account files can cause issues. Consider creating a new user account to restore stability.
4. Creating Printer Stability with New User Accounts
If problems persist, your user account might be at fault. Creating a new user account can often solve default printer change issues caused by account corruption.
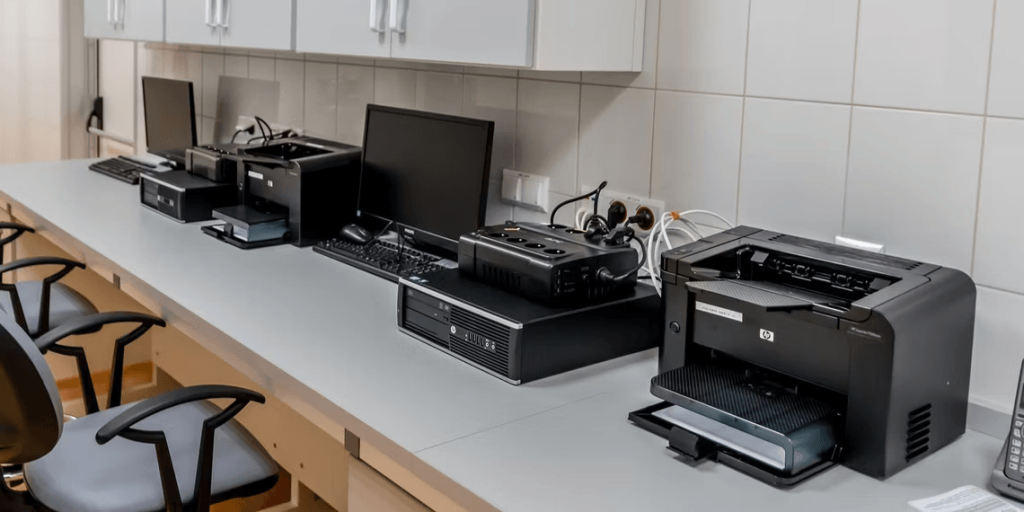
In conclusion, dealing with a constantly changing default printer on Windows can be frustrating, but it’s not an insurmountable problem. By following these comprehensive steps, you can regain control over your default printer settings and enjoy a smoother printing experience. Don’t let printer changes disrupt your workflow any longer; take action today and enjoy printing without interruptions.


Leave a Comment
Your email address will not be published. Required fields are marked with *