We have all been there. You have finally settled into a quiet evening, the house is still, and then a persistent splashing sound starts echoing from the bathroom. It isn’t just a minor sound; it is the rhythm of wasted money and precious resources hitting the drain. A leaking bathroom tap is one of those
We have all been there. You have finally settled into a quiet evening, the house is still, and then a persistent splashing sound starts echoing from the bathroom. It isn’t just a minor sound; it is the rhythm of wasted money and precious resources hitting the drain.
A leaking bathroom tap is one of those household issues that we often put off. We tell ourselves we will get to it “next weekend,” but those weekends turn into months. In the meantime, a single dripping faucet can waste over 3,000 gallons of water a year. That is enough water to take more than 180 showers!
Whether you are using high-quality faucets from a trusted brand like ESSCO or older fixtures that have seen better days, understanding the “why” and “how” of tap repair is a vital skill for any homeowner. You do not need a professional plumber’s license to solve this. With a bit of patience and the right approach, you can fix a leaky tap and restore the peaceful silence of your home.
Why is Your Bathroom Tap Leaking? Finding the Source
Before you start grabbing wrenches, you need to do a bit of detective work. To the naked eye, a tap looks like a simple metal pipe, but the inside is actually a precise assembly of seals, washers, and valves. These internal parts are constantly fighting against high water pressure to keep the flow shut off. Over time, even a tiny bit of wear on a single component gives that pressurized water an opening to escape, leading to that annoying, steady drip.
1. The Worn-Out Washer
If you have a traditional compression tap, this is almost certainly your problem. These models work by using a handle to screw a rubber washer down tight against a metal seat, which blocks the water. Imagine it as a stopper in a container.
Over the years, the constant grinding and pressure cause the rubber to get hard, brittle, or totally flattened out. Once the rubber loses its “squish,” it can’t make a tight seal anymore, and water starts sneaking past it.
2. Corroded Valve Seat
The valve seat is the internal bridge that connects the tap body to the spout. If you live in an area with “hard water,” minerals like calcium and lime tend to build up right on this seat. Over time, these deposits eat away at the smooth metal, leaving behind a rough, pitted surface. This is a real pain because even if you install a brand-new rubber washer, it won’t be able to sit perfectly flush against that uneven, crusty metal. Because the seal isn’t flat, the water just keeps trickling through the gaps.
3. A Damaged O-Ring
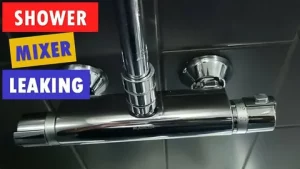
Have you noticed water seeping out from the base of the handle or the swivel point of the spout? That is usually the fault of the O-ring. This is a small rubber ring that seals the internal stem. If it becomes brittle or gets pinched during a previous repair, water will bypass the spout and leak out of the joints instead.
4. The Worn-Out Ceramic Disc
Most modern, high-end faucets have ditched the old-school rubber washers for ceramic disc cartridges. These are built to be incredibly tough and usually last for a very long time without any maintenance. However, they do have one weakness: debris. If a tiny bit of sand, grit, or a metal flake from your plumbing gets trapped between those two ceramic discs, it can leave a permanent scratch on the surface. Because these discs need to be perfectly smooth and flat to shut off the water, even a tiny hairline scratch is enough to let a steady leak through.
Your Pre-Repair Checklist: Gathering the Gear
There is nothing more frustrating than being halfway through a repair and realizing you are missing a specific tool. Before you take anything apart, set up your workspace.
What you will need:
- Adjustable Wrench: To loosen the larger nuts and the valve body.
- Screwdrivers: Both a flat-head and a Phillips-head (cross-head) will be necessary for different handle types.
- Replacement Parts: If you aren’t sure what size you need, wait until you disassemble the tap, then take the old parts to the hardware store to match them exactly.
- Penetrating Oil (WD-40): Older taps can be stubborn and “seized” due to rust or mineral buildup.
- A Soft Cloth or Old Towel: This is your most important “tool.” Use it to cover the drain (so you don’t lose screws) and to wrap around the chrome finish of your faucets so your wrench doesn’t scratch the metal.
Step-by-Step: How to Fix a Leaky Tap
Ready to dive in? Follow these steps carefully. If you get stuck, take a photo with your phone so you remember how the parts fit back together.
Step 1: Kill the Water Supply
Do not skip this! If you take the tap apart while the water is live, you will have a fountain in your bathroom. Look under the sink for the “isolation valves”—small knobs on the pipes. Turn them clockwise until they stop. If your sink doesn’t have them, you will need to turn off the main water valve for the entire house. Once off, turn the tap on to let the remaining water and pressure drain out.
Step 2: Remove the Handle
Most bathroom tap handles are held on by a hidden screw. Look for a decorative cap on top (often marked ‘H’ or ‘C’). Carefully try this off with a flat screwdriver. Once the cap is gone, unscrew the bolt underneath and pull the handle straight up. If it’s stuck, a little wiggle or a squirt of penetrating oil should loosen it.
Step 3: Remove the Valve or Cartridge
Grip it firmly with your adjustable wrench and unscrew it. If it’s been there for years, it might take some muscle to get it moving. Once it’s loose, just lift the whole unit straight out of the bathroom tap body.
Step 4: The Swap
- For Washer Taps: You’ll see a rubber washer held by a tiny nut. Unscrew it, toss the old, flattened washer, and pop a fresh one on.
- For Ceramic Taps: These come as a single cartridge. Since you can’t fix the internal discs, just swap the whole unit for a new one.
Step 5: Clean and Reassemble
Before you close everything up, take a damp cloth and wipe away any grit or white crusty buildup from inside the bathroom tap body. Once it’s clean, screw the valve or cartridge back in, slide the handle back on, and tighten that screw.
Step 6: The Moment of Truth
Turn your water supply back on slowly. Don’t blast it immediately. Check for any immediate leaks.
When is it Time to Just Replace the Tap?
If you pull the tap apart and find the internal brass is crumbling away, or if the chrome finish is pitting and peeling off in flakes, you are fighting a losing battle. Sometimes, if you’ve had to fix a leaky tap three times in a single year, the metal is likely too warped to ever hold a seal again.
When you reach that stage, an upgrade is the smartest move. If you choose a brand like ESSCO, you are getting a solid mix of great-looking design and tough internal parts that are built for the long haul. Modern faucets use high-grade materials that naturally fight off mineral buildup and scale. Investing in a quality wat tap now means you won’t have to break out the wrench and screwdrivers nearly as often in the future.
Conclusion
You don’t always need to call in an expensive plumber to get the job done. It’s a simple, satisfying task that stops you from wasting water and keeps your utility bills from creeping up for no reason. Once you have tightened that last screw and turned the water back on, you can finally enjoy a silent bathroom and a dry sink. There is nothing quite like the peace of mind that comes with a quick job well done.