

Introduction: The Beauty of DIY Lip Gloss In a world filled with commercial beauty products that often contain a laundry list of unpronounceable ingredients, there’s something incredibly appealing about creating your own beauty essentials. Lip gloss, with its ability to add a touch of glamour and shine to your everyday look, is no exception to
Introduction: The Beauty of DIY Lip Gloss
In a world filled with commercial beauty products that often contain a laundry list of unpronounceable ingredients, there’s something incredibly appealing about creating your own beauty essentials. Lip gloss, with its ability to add a touch of glamour and shine to your everyday look, is no exception to this trend. However, many store-bought lip glosses come with a hefty price tag, and the quest to decipher their ingredients can be quite the endeavor. That’s where the allure of DIY comes into play.
I’m Dr. Joseph Mercola, and I’m here to guide you through the fascinating world of crafting your very own lip gloss at home. In this article, we will explore simple, natural, and cost-effective methods to create your very own luscious lip gloss. Say goodbye to overpriced commercial options, and get ready to say hello to a fun, creative, and highly customizable beauty project that lets you take control of what goes onto your lips.
The Allure of DIY Lip Gloss: Why Make Your Own?
Before we dive into the nitty-gritty of crafting your lip gloss, let’s explore the many benefits of making your lip gloss at home:
1. Natural Ingredients: One of the most significant advantages of crafting your own lip gloss is that you have complete control over what goes into it. You can ensure it’s free from harmful chemicals and artificial additives, giving you peace of mind about the ingredients you’re applying to your lips.
2. Cost-Effective: Have you ever cringed at the price of a tiny tube of lip gloss? With DIY lip gloss, you can create multiple shades and flavors at a fraction of the cost of their store-bought counterparts. Not only will you have more lip gloss for your money, but you can also customize it to your preferences.
3. Customization: Store-bought lip glosses might offer various shades and flavors, but they can’t beat the level of customization you’ll achieve with DIY lip gloss. Whether you prefer a particular scent, color, or texture, you can tailor your homemade lip gloss to suit your style.
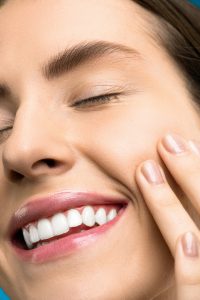
Photo by Shiny Diamond: https://www.pexels.com/photo/close-up-photo-of-woman-with-pink-lipstick-smiling-with-her-eyes-closed-3762408/
Gathering Your Ingredients: Natural and Simple
Now that you’re sold on the idea of making your lip gloss let’s start by gathering the basic ingredients you’ll need. These ingredients are not only readily available but are also natural and simple:
– Coconut Oil: This natural wonder is the base of your lip gloss. It provides hydration to your lips while offering a glossy finish that’s essential for any lip gloss.
– Beeswax: Beeswax is a crucial ingredient that creates the smooth texture you associate with lip gloss. It helps your lip gloss glide onto your lips effortlessly.
– Essential Oils: These not only add delightful scents and flavors to your lip gloss but also bring additional benefits. For instance, you can use peppermint essential oil for a fresh, minty scent, or lavender essential oil for a soothing and relaxing aroma.
– Mica Powder: If you desire a touch of color and shimmer in your lip gloss, mica powder is your go-to ingredient. It’s available in various shades, allowing you to choose the one that best suits your style.
Crafting Your Lip Gloss: Step-by-Step Guide
Now that you’ve gathered your ingredients, it’s time to roll up your sleeves and start crafting your lip gloss. Here’s a step-by-step guide to help you create the perfect lip gloss:
Step 1: Gather Your Supplies
Before you begin, make sure you have the following supplies ready:
- A small pot or microwave-safe bowl
- A stirring stick or spoon
- Small lip gloss containers or empty lip gloss tubes
- Labels (optional, for naming your lip gloss creations)
Step 2: Combine Beeswax and Coconut Oil
Start by taking your small pot or microwave-safe bowl and adding a tablespoon of beeswax and two tablespoons of coconut oil. This combination will give your lip gloss the ideal texture and consistency.
Step 3: Heat and Stir
If you’re using a microwave, heat the mixture for 20-30 seconds until it’s fully melted. If you’re using a stovetop, use low heat and stir continuously until the beeswax and coconut oil have melted completely and are well combined.
Step 4: Add Mica Powder
Once your beeswax and coconut oil are fully combined, it’s time to add a pinch of mica powder to give your lip gloss its color and shimmer. The amount of mica powder you use will depend on how intense you want the color to be. Start with a small amount and gradually add more until you achieve your desired shade.
Step 5: Scent and Flavor
Now, add a few drops of your chosen essential oil to scent and flavor your lip gloss. Remember, a little goes a long way with essential oils, so start with a small number of drops and adjust to your preference.
Step 6: Pour into Containers
Carefully pour the liquid lip gloss into your small lip gloss containers or empty lip gloss tubes. Work quickly, as the mixture can begin to solidify.
Step 7: Let It Cool
Allow your lip gloss to cool and solidify. This should take about 30 minutes to an hour, depending on the size of your containers.
Step 8: Label and Enjoy
If you wish, you can label your lip gloss containers with the color and flavor you’ve created. Once they’re labeled, your lip gloss is ready to use and share with friends and family.
Congratulations! You’ve just crafted your very own homemade lip gloss that’s completely customizable and free from harmful chemicals. You can now enjoy the benefits of a natural, cost-effective, and highly personalized beauty product.

Image by: https://www.vogue.in/beauty/content/from-ananya-panday-to-kylie-jenner-glossy-lips-are-the-new-celebrity-favourite
Flavor and Color: Customizing Your Creation
One of the most exciting aspects of crafting your own lip gloss is the freedom to customize it to your heart’s desire. You can add various flavors and colors to make your lip gloss uniquely yours. Here are some ideas for flavoring and coloring your creations:
– Flavor Your Lip Gloss:
- Peppermint: A few drops of peppermint essential oil will give your lip gloss a refreshing and invigorating flavor.
- Vanilla: Vanilla extract provides a sweet and delightful taste to your lip gloss.
- Strawberry: Use strawberry extract for a fruity and delicious flavor.
- Honey: A touch of honey adds a natural sweetness to your lip gloss.
– Color Your Lip Gloss:
- Pink or Red: For a classic lip gloss hue, use a pink or red mica powder.
- Nude or Clear: For a more natural look, opt for a nude or clear mica powder.
- Shimmery: If you desire a shimmery finish, choose a mica powder with a touch of sparkle.
- Custom: Mix and match mica powders to create unique shades that suit your style.
The possibilities are endless, and you can create lip glosses in various shades and flavors to match different occasions and moods. Experiment and have fun with your creations!
Storing Your Homemade Lip Gloss
To keep your DIY lip gloss in optimal condition, it’s essential to store it properly. Here are some tips to ensure your homemade lip gloss stays fresh and ready to use:
- Tightly Seal the Containers: Make sure the lids of your lip gloss containers are tightly sealed to prevent air from getting in and affecting the consistency of your lip gloss.
- Store in a Cool Place: Keep your lip gloss in a cool, dry place away from direct sunlight. High temperatures can cause it to melt or change its texture.
- Use Clean Applicators: If you’re using lip gloss in containers, make sure to use clean applicators, such as disposable lip gloss wands, to avoid introducing any contaminants.
- Check for Changes: Periodically inspect your lip gloss for any changes in texture, color, or scent. If you notice any alterations, it may be time to make a fresh batch.
Proper storage will ensure that your homemade lip gloss maintains its quality and remains safe for use over an extended period.
Sharing the DIY Beauty Secret
The joy of creating your own lip gloss doesn’t have to be a solitary experience. Why not share this wonderful DIY beauty secret with your friends and family? Consider hosting a lip gloss crafting party where you can create lip gloss together, experiment with different flavors and colors, and enjoy a fun, creative, and memorable time with your loved ones.
You can also gift your homemade lip gloss to family and friends, providing them with a unique and personalized beauty product that reflects your creativity and care. It’s an excellent way to spread the love and share the joy of DIY beauty.
Conclusion: Glossy Lips, Happy Heart
Crafting your own lip gloss at home is not only a creative and enjoyable endeavor, but it also offers numerous benefits. You get to control the ingredients, create lip gloss in your favorite colors and flavors, and save money while doing so. Additionally, you’ll enjoy the peace of mind that comes with knowing exactly what’s in the beauty products you use.
Say goodbye to overpriced, commercially produced lip glosses that often contain questionable ingredients, and say hello to your very own luscious lip gloss. With your DIY lip gloss, you can enjoy the beauty of glossy lips while having a happy heart, knowing that you’ve created a natural, budget-friendly, and highly customizable alternative. So, get ready to embrace your new beauty routine, have fun crafting, and enjoy your radiant, naturally crafted smile.


Leave a Comment
Your email address will not be published. Required fields are marked with *